
Haloral Red Light Therapy Mat User Manual & Quick Start Guide (PDF Download)
Welcome to your ultimate guide for the Haloral Red Light Therapy Mat — designed to enhance relaxation, relieve muscle tension, and promote full-body recovery with advanced red light therapy and vibration massage technology.
In this blog, you’ll find a download link for the user manual (PDF), a step-by-step quick start guide, and expert usage tips to help you achieve the best results.
📥 Download the Haloral Red Light Therapy Mat User Manual (PDF)
👉 Click here to download the User Manual PDF
Note: This PDF version is compressed to a lower resolution due to upload size limitations. For a high-resolution digital version, please email us at support@haloral.com and we’ll be happy to provide it.
The physical printed manual is included in every package and can be found inside the small white box that also contains the remote control.
Quick Start Guide – How to Use the Haloral Red Light Therapy Mat
🔌 Setup Instructions
When you unroll and open the mat, you will notice that the square display panel is already attached to the mat with a protective film.
➡️ Peel off the film before starting.
- Connect the Power Supply
Use the provided Type-C cables to connect the mat to the display panel.
Then, plug the power adapter into a wall outlet.
🎛️ Using the Display Panel
Power On
- Press and hold the Power Button (located on the side of the display panel) until the screen lights up.
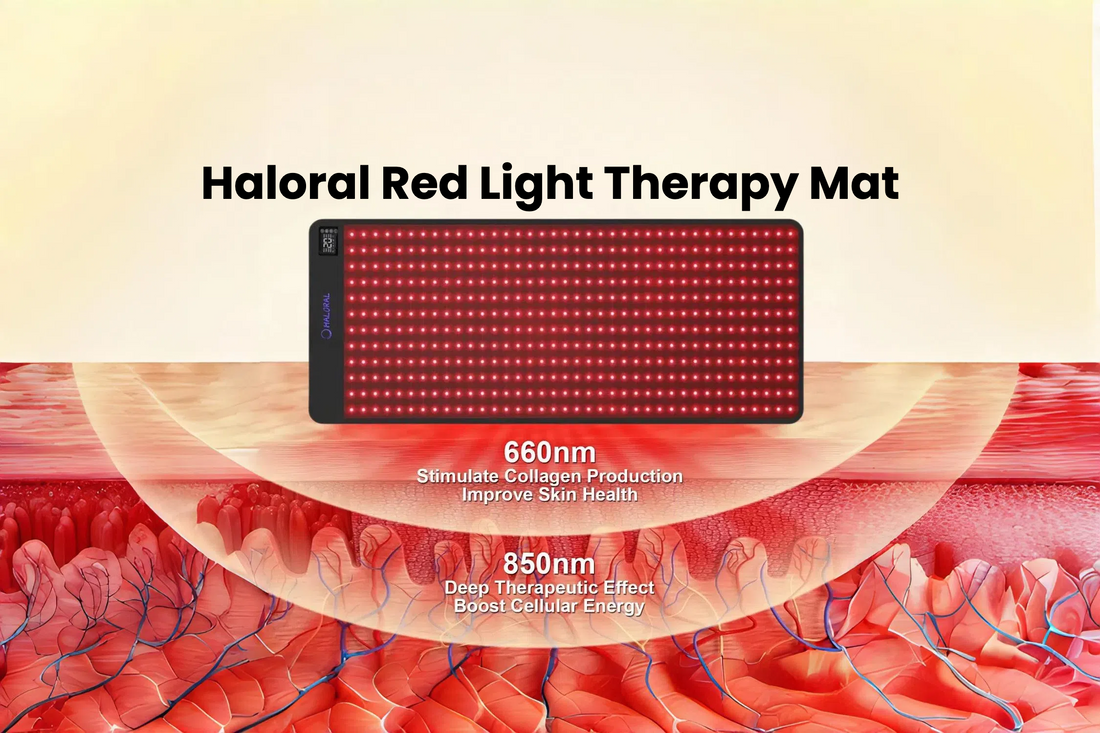
Red Light Therapy Settings
- Tap the Red Light Level button (the upper right button on the display panel) to cycle through intensity levels: L (Low) → M (Medium) → H (High) → Off
- When the red light is active, the indicator will flash.
- You can use Red Light Therapy on its own or combine it with massage functions for enhanced therapy sessions.
Massage Settings
- Adjust intensity using the “+” and “–” buttons (levels 1–20). Each adjustment is confirmed by a beep.
- To turn off the massage, set the intensity to 0.
- Press the Mode (M) button to switch between 8 preset massage modes. Each mode change is confirmed by a beep.
🎮 Using the Remote Control
1. Charge the Remote
Fully charge the remote using the provided Type-C cable before first use.
2. Power On via Remote
Point the remote at the display panel and hold the M button for 3 seconds until the indicator lights up.
(Note: Due to the limited range of the wireless remote, it’s recommended to power on the display panel manually first for best results.)
3. Adjust Massage Intensity
Use the “+” and “–” buttons on the remote to set massage intensity (levels 1–20).
Setting it to 0 will turn off the massage function.
4. Switch Massage Modes
Press the M button to toggle between the 8 massage modes. Each switch will be confirmed by a beep.
5. Adjust Red Light Intensity
Press the Red Light Level button on the remote to cycle through: Low (Green) → Medium (Orange) → High (Red) → Off
Recommended Usage Scenarios
|
Goal |
Recommended Modes |
Light Level |
Massage Intensity |
|---|---|---|---|
|
Relaxation & Stress Relief |
Mode 1 / Mode 6 |
Low-Medium |
5–10 |
|
Muscle Recovery |
Mode 2 / Mode 8 |
Medium |
10–15 |
|
Warm-Up Before Exercise |
Mode 3 / Mode 4 |
Medium-High |
12–16 |
|
Deep Tissue Massage |
Mode 5 / Mode 7 |
High |
15–20 |
Any Other Questions?
If you need a higher-resolution digital manual or have any other questions regarding setup or usage, please reach out to us:
📧 support@haloral.com